
Tile floors require proper care to prevent damage from water, foot traffic, and incorrect cleaning. Tile Restoration techniques address issues like chips, cracks, delamination, and discoloration, extending flooring life. Prompt action is crucial, as early repair prevents complex restoration needs and higher costs. Preparation involves floor clearance, damage assessment, and gathering tools. Restoring tiles involves grouting small damages or replacing damaged areas; sealing protects against future issues. Grout cleaning ensures aesthetic appeal and durability. Professional tile cleaning and polishing services offer advanced techniques for deeper cleans. Regular maintenance with pH-neutral cleaners and sealing prolongs tile life.
Damaged tile floors can significantly impact the aesthetics and functionality of any space. This comprehensive guide delves into the world of tile restoration, offering insights on understanding common damage types, the urgency of quick action, and essential preparation steps. From repairing chipped tiles to revitalizing grout, we explore various techniques. Learn how professional cleaning and polishing services enhance results, followed by expert tips for maintaining your restored tiles. Discover the secrets to restoring your floors’ former glory with our expert advice on tile restoration.
Understanding Tile Damage: Common Causes and Types

Tile floors, known for their durability, can still sustain damage over time due to various factors. Understanding common causes and types of tile damage is the first step in effective restoration. One of the primary culprits is water intrusion, leading to mold growth and mildew, especially in areas with poor ventilation or leaks. This not only deteriorates the tiles but also poses health risks.
Another prevalent issue is wear and tear caused by heavy foot traffic, especially in high-traffic zones like kitchens and bathrooms. Chips, cracks, and delaminating (separation of the tile’s surface from its backing) are common consequences. Moreover, improper cleaning methods or exposure to harsh chemicals can also damage tiles, etching their surface or discoloring them. Tile Restoration techniques aim to address these issues, restoring the floor to its original condition and ensuring longevity.
The Importance of Quick Action After Tile Damage

When tile floors are damaged, whether from cracks, chips, or delaminating surfaces, quick action is crucial for successful tile restoration. Delaying repair can lead to further damage and make the eventual restoration process more complex and costly. Moisture infiltration, for instance, can cause underlying subfloor damage and even encourage mold growth if left untreated.
Prompt intervention allows for more effective tile restoration techniques. This may include repairing or replacing individual tiles, reglazing surfaces for a like-new finish, or even installing new flooring if the damage is extensive. The key is to address the issue as soon as possible to preserve the integrity of the floor and maintain its aesthetic appeal through proper tile restoration.
Preparation for Tile Restoration: What You Need to Know
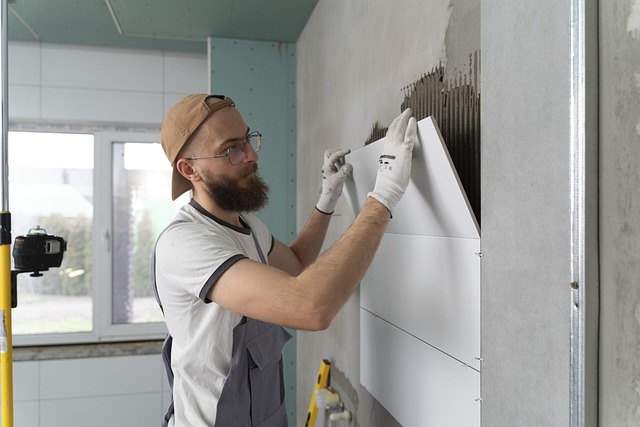
Before tackling tile restoration, proper preparation is key to achieving the best results. Begin by clearing the floor area of any loose debris or furniture. This ensures a clean canvas for the restoration process. Next, assess the extent of the damage—whether it’s cracked tiles, chipped edges, or discolored grout. Gathering the necessary tools and materials is crucial; you’ll need a floor scraper, wire brush, sandpaper, a grout saw, tile cleaner, and sealer.
Safety gear, such as gloves and eye protection, should also be on hand. Prepare your workspace by masking off adjacent areas to prevent mess and ensure efficient cleanup. Proper ventilation is essential during the restoration process due to the potential for strong fumes from cleaning solutions.
Techniques for Repairing Chipped and Cracked Tiles

Restoring damaged tile floors involves more than just cleaning; it often requires repairing chipped and cracked tiles to return them to their former glory. One effective technique for small chips and cracks is the use of tile grout, a material designed to fill in gaps and match the existing tile color. This process begins by removing any loose debris or remnants of old grout with a soft brush or vacuum. Once the area is clean, apply a small amount of new grout using a grouting tool, pressing it gently into the damaged area until it’s level with the surrounding tiles. After allowing the grout to set and cure, use a damp cloth to buff away any excess, leaving behind a seamless repair.
For larger cracks or more significant damage, a more intensive approach is needed. In such cases, removing the loose pieces of tile and replacing them may be necessary. This involves carefully cutting out the damaged tile, preparing the subfloor if needed, and installing new tiles that match the original design. Tile Restoration professionals often use advanced tools and techniques to ensure precise cuts and exact color matching. Proper sealing and finishing touches complete the repair, restoring not just the tiles but also the overall aesthetic of the floor.
Restoring Grout: Cleaning, Replacing, and Sealing

Restoring grout is an essential part of tile restoration, as it not only enhances the visual appeal but also ensures the longevity and functionality of your tiled floors. Begin by thoroughly cleaning the grout lines using a soft-bristled brush and a solution of warm water and mild detergent. This step removes any dirt, stains, or grime that have accumulated within the grout. After cleaning, inspect the grout for damage or missing sections. Small gaps can often be filled in with new grout, while larger repairs may require replacing entire segments.
To ensure longevity, apply a high-quality grout sealer after repairing and cleaning. This protective layer creates a barrier against moisture, dirt, and stains, preserving the fresh look of your tiles and grout. Regular maintenance, such as sweeping and mopping, will help keep your restored tile floors in pristine condition for years to come, making it an integral part of any comprehensive tile restoration process.
Professional Tile Cleaning and Polishing Services

Professional Tile Cleaning and Polishing Services are a crucial aspect of Tile Restoration, ensuring that your floors regain their original beauty and longevity. These services employ advanced techniques and specialized equipment to thoroughly clean, scrub, and polish tiles, eliminating stains, grime, and dullness. The process starts with deep cleaning to remove embedded dirt and debris, followed by honing and polishing to restore the tile’s natural gloss and texture.
Polishing also fills in minor scratches and imperfections, enhancing the floor’s overall appearance. Many companies offer both one-time cleanings and regular maintenance packages, catering to various needs. Opting for professional services guarantees a deeper clean that DIY methods might miss, prolongs the life of your tiles, and enhances their aesthetic appeal, making them a valuable investment in your Tile Restoration journey.
Protecting Your Restored Tiles: Maintenance Tips
After successfully restoring your damaged tile floors, proper maintenance is crucial to keep them looking their best and prolong their lifespan. Regular cleaning plays a vital role in tile restoration, so opt for a gentle, pH-neutral cleaner to avoid damaging the restored tiles. Avoid using harsh chemicals or abrasive cleaners that can detract from the restoration work.
Additionally, consider sealing your tiles after restoration to protect them from stains and moisture. This simple step can significantly extend the life of your restored tiles. Remember, regular maintenance will ensure your tile floors remain in pristine condition for years to come, enhancing the overall aesthetics of any space.